- Published on
Website deployment with NGINX + Server Blocks on Ubuntu Linux
- Authors
- Name
- Milan Zeisler
- Job Title
- Medior Full-Stack Developer
Introduction
In this article, I will help you to walk through the deployment of your website using NGINX + Server Blocks on your Ubuntu Linux machine (remote server or desktop).
What is NGINX?
NGINX [engine x] is an HTTP and reverse proxy server, a mail proxy server, and a generic TCP/UDP proxy server, originally written by Igor Sysoev.
Why to use Server Blocks?
Server Blocks are often called NGINX Virtual Hosts. In my opinion, this is the best feature of NGINX: it makes the whole web server to be a more effective system, just like to keep a logical folder structure as with Server Blocks you are holding all your websites/domains in a separate file it's far easier to find what you are looking for.
- Easier to manage
- Logical folder structure
- Better error-handling
- Faster executing time
Installation
First of all, it's recommended to update your Linux dependencies before adding a new one.
sudo apt-get update
Install NGINX from the APT packaging system:
sudo apt-get install nginx
Extending the Firewall
In order to avoid any problems with accessing your website or NGINX itself from the outside world, it's a good idea to extend your firewall.
UFW can help you to list the available applications that are supported by itself:
sudo ufw app list
For now (without HTTPS) the best option to start with is the basic HTTP profile:
sudo ufw allow 'Nginx HTTP'
Review Your Webserver
For the first step, it's a good idea to check whenever your NGINX's systemctl process is running and active:
systemctl status nginx
In other and easier way, you can load your server's IP address in your browser, eg: http://[sderver_ip] or CURL from your terminal:
curl http://{server_ip} # insert your server's IP after the curl command
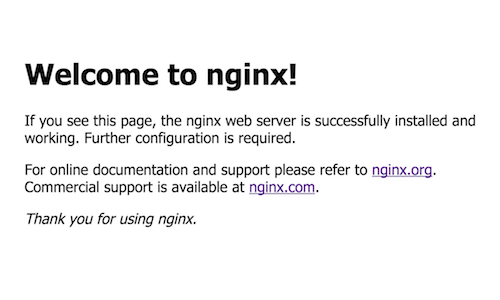
If you see this, your NGINX is up and running:
 [NGINX Welcome Page Message - nginx.com]
Setup your first Server Block
To get started, you need to add your website's content folder first - the folder where you will keep your website's HTML, CSS, JavaScript, PNG/JPG, PHP, and any files.
sudo mkdir -p /var/www/{your_domain_name}
Add a simple HTML file for the testing:
sudo nano /var/www/{your_domain_name}/index.html
Copy this code and paste by going to your terminal then right-click + paste (to save the file, hit: CTRL+O, and Enter to save):
<html>
    <head>
        <title>My first domain with NGINX Server Blocks</title>
    </head>
    <body>
        <h1>My first domain with NGINX Server Blocks is up and running. 😉</h1>
    </body>
</html>
And finally, add the actual Server Block to NGINX's folder structure:
sudo nano /etc/nginx/sites-available/{your_domain_name}
Copy this code and paste by going to your terminal then right click + paste but don't forget to change [your_domain_name] definitions:
server {
        listen 80;
        listen [::]:80;

        root /var/www/{your_domain_name}/html;
        index index.html;

        server_name {your_domain_name} www.{your_domain_name};

        location / {
                try_files $uri $uri/ =404;
        }
}
Link the file from sites-available to sites-enabled:
sudo ln -s /etc/nginx/sites-available/{your_domain_name} /etc/nginx/sites-enabled/
Final Steps
Test your NGINX configuration file(s) to see if you had any typos or if there any problems with the definitions:
sudo nginx -t
If there isn't any error, you can continue to restart your NGINX webserver to enable your new Server Block:
sudo systemctl restart nginx
Additional help
Are you looking for a professional server administrator for a great price? Click here and let's meet on Fiverr.